
Types of Concrete Crack Fillers and How to Choose
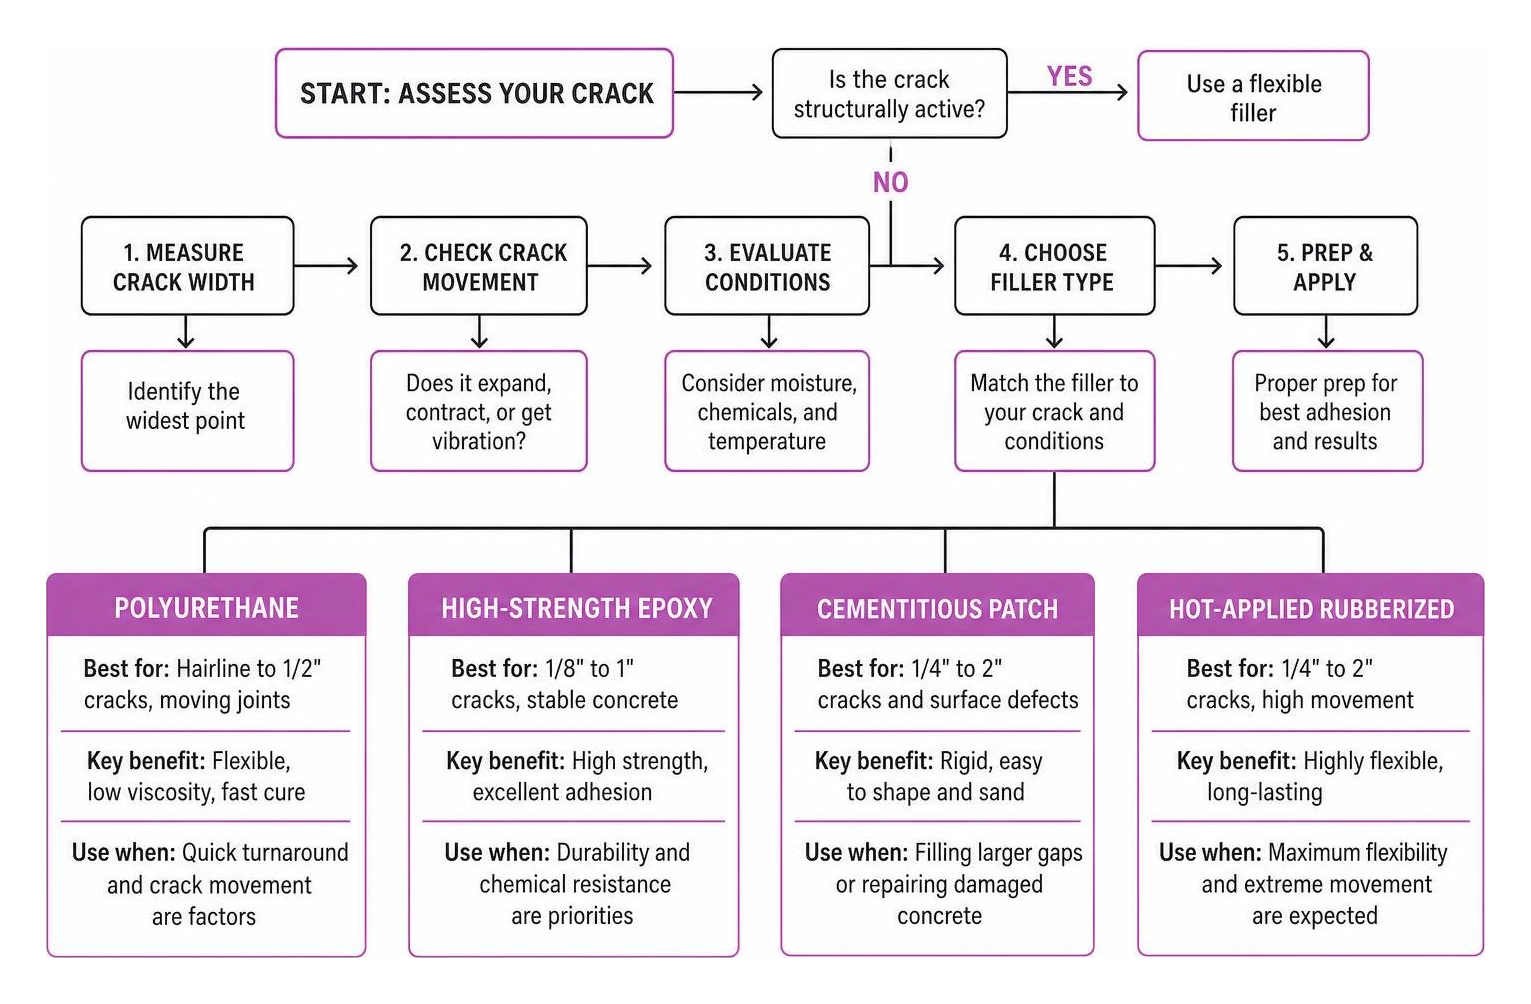
Choosing the ideal garage crack filler comes down to understanding the chemistry behind each product type and matching it to your floor’s unique damage. Not all concrete cracks are created equal, and using the wrong material can lead to premature debonding, cracking, or floor coating failure.
When evaluating options, you will primarily choose between polyurethane formulas, high-strength epoxies, cementitious patches, and hot-applied rubberized fillers. Each category excels in specific situations, ranging from fine hairline cracks to gaping two-inch gaps.
| Crack Filler Type | Viscosity & Elasticity | Best Crack Width | Cure Time | Ideal Application |
|---|---|---|---|---|
| Polyurethane | Very low viscosity, flexible | Hairline to 1/2″ | Minutes to 4 hours | Fast prep, hairline stabilization, moving joints |
| Epoxy Resin | Moderate to thick, rigid | 1/16″ to 1″ | 16–24 hours | Heavy industrial loads, structural re-bonding |
| Cementitious Patch | Thick paste / mortar, rigid | 1/2″ to 2″ | 24–72 hours | Very wide stationary cracks, deep spalls |
| Hot-Applied Rubber | Meltable solid, highly flexible | 1/2″ to 1″ | 20 minutes | Outdoor driveways, exterior expansion joints |
Polyurethane Garage Crack Filler for Deep Penetration
Polyurethane concrete crack repair formulas are favored for interior residential garage slabs because of their ultra-low viscosity and rapid cure rates. Because polyurethane is as thin as water when initial mixing occurs, gravity pulls it deep into hairline cracks (under 1/16 inch) without requiring heavy mechanical grinding or routing.
When applied, products like CrackWeld penetrate deep into the concrete matrix, bonding structural sidewalls together. For cracks wider than a hairline, mixing pure dry silica sand into the crack prior to or during liquid injection adds mass, reduces heat generation, and builds an incredibly dense, load-bearing repair capable of supporting heavy vehicles within minutes. If you want to learn more about achieving a level floor, read our guide on A Smooth Move for Your Cracked Concrete Floor.
High-Strength Epoxy Garage Crack Filler
When structural re-bonding and extreme load-bearing capacity are required, pourable epoxy crack fillers like Garon-Seal HCR provide superior mechanical strength. Unlike polyurethanes that retain subtle flexibility, 100% solids epoxy cures into an unyielding, rigid composite that creates both a mechanical and chemical bond with the concrete substrate.
Epoxies excel on industrial floors, loading docks, and heavy-duty home workshops subject to floor jack pressure, steel-wheeled toolboxes, and aggressive chemical spills. A typical 1.5-gallon epoxy kit provides roughly 346 cubic inches of coverage, yielding an indestructible filler layer. However, epoxies require longer cure schedules—typically 16 to 24 hours at 70°F before permitting light traffic. To discover more about handling floor splits, explore how to Stop the Split with These Epoxy Floor Crack Repair Secrets.
Cementitious Patching and Hot-Applied Solutions
For severe damage exceeding one inch in width, liquid fillers can bleed away into sub-base voids or prove cost-prohibitive. In these cases, vinyl-modified cementitious patching mortars like Quikrete Vinyl Concrete Patcher offer a thick, workable consistency. Mixed at a standard ratio of 7 parts powder to 1 part water, these mortars are troweled deep into wide voids. They require careful temperature management, needing ambient temperatures above 40°F for a full 24-hour cure window.
On the other hand, hot-applied rubberized rope fillers (such as Pli-Stix or Crack-Stix) offer flexible joint sealing. Formulated with asphaltic rubber wrapped in a melt-away plastic mantle, these sticks are wedged into control joints and melted using a propane torch. As the compound liquefies and cools, it cures into a watertight, elastic plug within 20 minutes. Learn more about managing wider gaps in our article detailing why Big Cracks Are No Match for This Repair Guide.
Surface Preparation and Repair Techniques for Garage Crack Filler
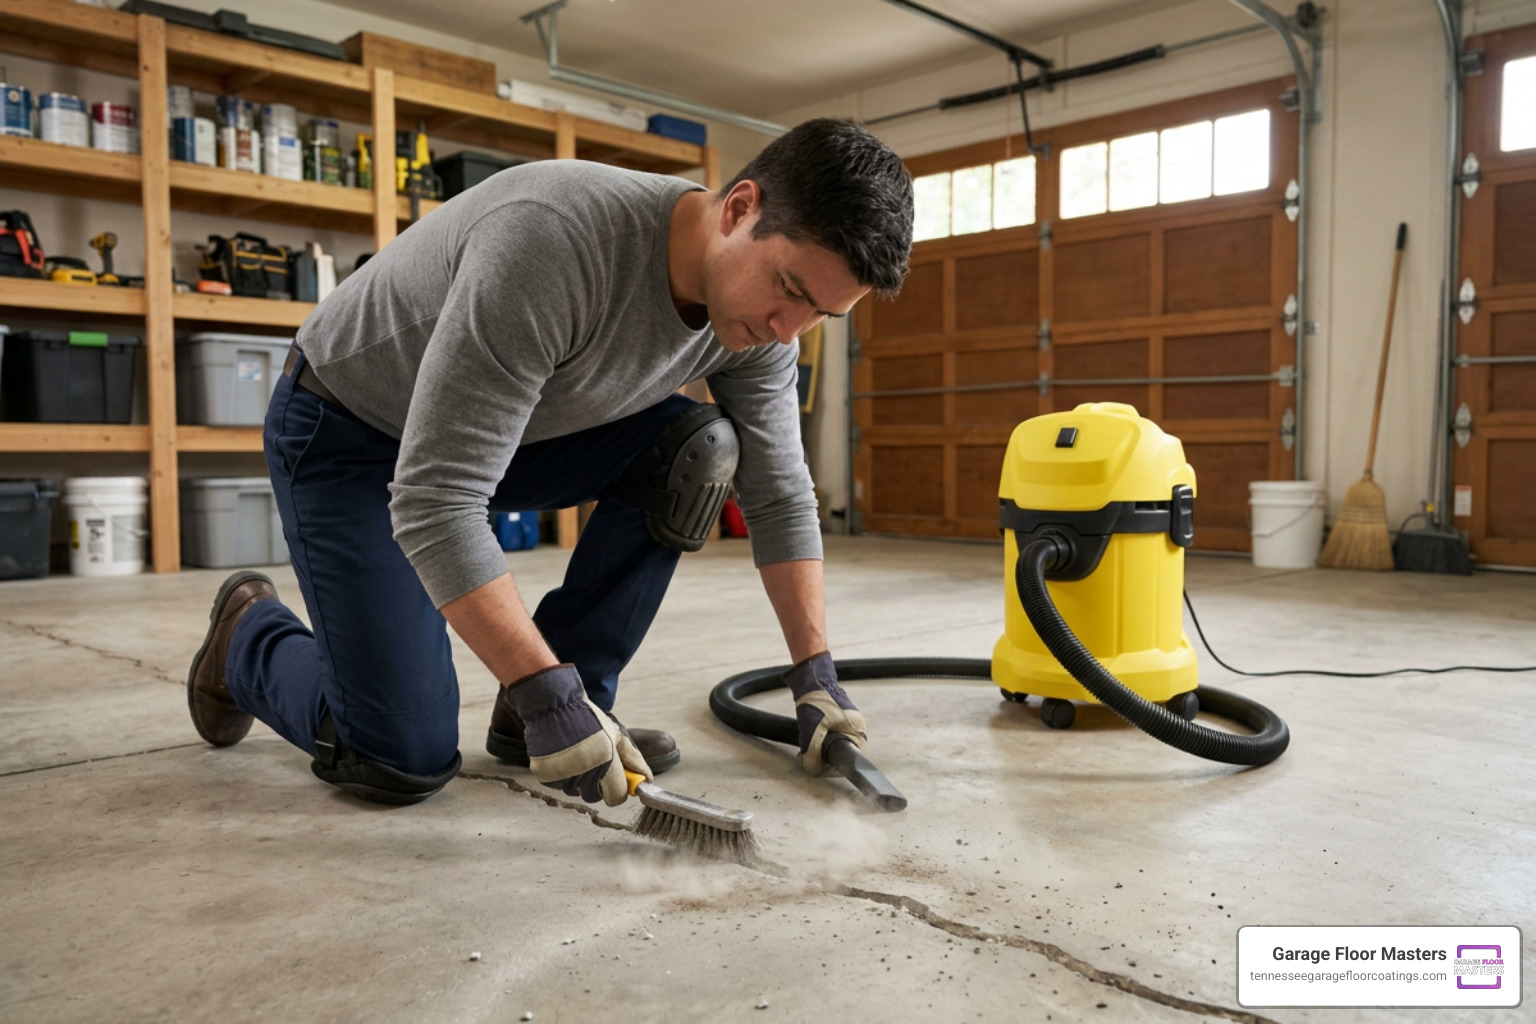
No matter how advanced your chosen garage crack filler is, the final repair will fail if the concrete surface is dirty, crumbling, or saturated with oil. Proper surface prep opens the concrete pores and eliminates loose debris, giving the repair material an anchor point.
To achieve maximum longevity, follow this step-by-step preparation procedure:
- Chisel Loose Concrete: Use a hammer and cold chisel or crack router to remove fractured edges and widen undercut sides into an inverted “V” or rectangular channel.
- Brush Away Friction Dust: Thoroughly scrub inside the crack channel using a stiff-wire brush to loosen micro-particles and weak laitance.
- Vacuum Clean: Use a high-powered shop vacuum to extract all dust, dirt, and dry debris from deep within the crevice.
- Insert Backer Rod (For Deep Cracks): If the crack extends deeper than 1/2 inch, press closed-cell foam backer rod into the gap to control repair depth and save filler material.
- Dampen Surface (For Cementitious Repairs Only): If using a vinyl concrete patcher, lightly spray or brush water into the channel to prevent dry concrete from sucking water out of the fresh mortar.
Mastering these core prep habits ensures long-lasting adhesion; see The Secret to Seamless Epoxy Garage Floor Patching for more insider techniques.
Fixing Hairline Cracks vs. Wide Cracks Up to 2 Inches
Fixing fine hairline cracks differs significantly from repairing wide, 2-inch wide slab splits. Hairline cracks require high-flow, low-viscosity polyurethane injected directly through static mixing nozzles. The low surface tension allows liquid filler to creep deep into raw concrete pores without requiring aggressive chiseling.

When addressing massive cracks up to 2 inches wide, standard caulks and liquid fillers will sag or shrink excessively. Instead, consider creating an isolation joint or using a structural anchor system:
- Mechanical Anchor Method: Drill into opposing slab faces, install Tapcon anchors, place closed-cell backer rods, and fill the main gap with high-modulus mortar or heavy-duty elastomeric sealant.
- Trowel Technique: Apply vinyl concrete patcher in layers, stabbing the trowel repeatedly into the fresh mortar to break air bubbles before smoothing flush with surrounding concrete.
For a deeper look into how slab dynamics create these challenges, check out our insights on Garage Floor Cracking.
Safety Rules for Torch-Applied and Chemical Fillers
Safety must be top priority when handling specialized concrete repair products. Chemical-based resins (like two-part epoxies and polyurethanes) release volatile organic compounds (VOCs) and exothermic heat during chemical cross-linking, while hot-applied rubberized sticks require open-flame propane torches.
- Wear Personal Protective Equipment: Always wear eye protection goggles, thick nitrile or leather work gloves, long sleeves, heavy pants, and closed-toe work boots.
- Maintain Torch Distance: Keep propane torches adjusted to a 3-to-4-inch flame with a 1-inch inner blue cone. Hold the nozzle at a 45-degree angle approximately 3 inches away from the material, sweeping back and forth continuously to prevent concrete spalling.
- Avoid Indoor Flame Hazards: Never use open-flame propane torches or hot-pour asphalt products inside enclosed residential garages or near vertical walls. Open flames inside closed areas present carbon monoxide, flame, and vapor ignition hazards.
Cure Times, Traffic Readiness, and Climate Durability

Understanding cure schedules is essential when restoring a working garage floor. Returning heavy vehicle traffic to a patch too soon can crush uncured polymers, causing structural breakdown.
- Polyurethane Fillers: Initial set occurs in 5 to 10 minutes. Full cure for vehicle weight is reached within 1 to 4 hours.
- Hot-Applied Rubber: Cools and hardens rapidly, becoming traffic-ready in approximately 20 minutes.
- Pourable Epoxies: Require 16 to 24 hours at 70°F for light foot traffic and up to 72 hours for full vehicular weight.
- Vinyl Concrete Patchers: Require 24 hours for foot traffic and a minimum of 3 days before driving vehicles over the repaired zone.
In East Tennessee regions like Knoxville, Oak Ridge, and Maryville, winter weather presents unique freeze-thaw challenges. Water that seeps into unsealed concrete cracks freezes, expands by approximately 9%, and exerts severe hydraulic pressure against internal aggregate. Flexible polyurethanes (such as Sikaflex SL or Vulkem 116) absorb slab expansion and contraction across seasonal temperature shifts without tearing loose.
If a concrete slab suffers from severe structural sub-base failure or active settlement, surface fillers act only as temporary bandages. In severe scenarios, cutting out and repouring affected slab sections remains the ultimate permanent fix. For more details on underlying slab risks, read our article on Cracked Garage Foundation Causes and Risks You Need to Know.
Prepping Garage Floor Cracks for Epoxy or Polyaspartic Coatings
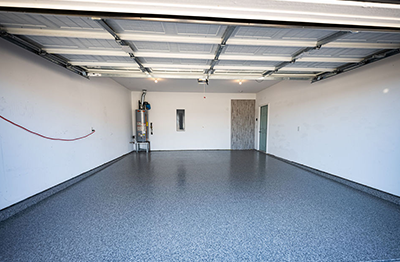
If your goal is installing a seamless, high-performance floor finish, proper crack repair is an absolute prerequisite. Topcoat systems like polyaspartic and epoxy floor coatings cannot bridge active cracks; any unaddressed slab movement will telegraph directly up through fresh decorative coatings.
When prepping cracks before topcoating, low-viscosity polyurethanes and fast-setting epoxy patching mortars are the gold standard. They cure into dense composites that bond tightly with underlying concrete.
- Inject fast-curing polyurethane or pourable epoxy flush into all cracks.
- Allow the material to cure completely according to manufacturer instructions.
- Use a diamond-cup wheel angle grinder or industrial floor grinder to grind elevated filler ridges completely flat and flush with surrounding concrete.
- Vacuum away all residual silica dust to expose a smooth surface ready for primer intake.
Following this workflow ensures a seamless floor that will look incredible for decades. Discover additional long-term repair strategies in The Ultimate Guide to Permanent Garage Floor Repair.
Frequently Asked Questions About Garage Floor Crack Repair
How long before I can drive on a repaired concrete crack?
Drive-on time depends heavily on your chosen material. Fast-setting polyurethane crack fillers reach full load-bearing strength in under an hour. Hot-applied rubberized fillers harden as they cool, taking around 20 minutes. However, rigid pourable epoxies generally require 24 to 42 hours, while vinyl cementitious mortars require a full 3 days before supporting vehicle weight.
Are concrete crack repair products truly permanent?
No surface-applied concrete filler can be guaranteed 100% permanent if underlying sub-base soils are actively shifting or settling. While high-grade epoxies and polyurethanes form structural bonds stronger than concrete itself, active slab movement or severe freeze-thaw cycles can cause new cracks right beside the old repair. For severe foundation movement, explore The Best Ways to Fix Your Garage Foundation for Good.
Can I torch-apply hot rubberized crack filler indoors?
No, you should never use open-flame torch-applied rubber fillers inside an enclosed garage. Torching indoors creates severe carbon monoxide hazards, potential ignition risks near household fumes, and intense odor. Keep torch-applied products outdoors on exterior driveways, walkways, and patio slabs, utilizing cold-pour polyurethanes or epoxies for indoor floor repairs.
Conclusion
Finding the right garage crack filler and applying it with correct prep techniques stops structural degradation in its tracks. Whether dealing with minor hairline cracks or wider isolation gaps, selecting the proper chemistry restores peace of mind and preserves your home’s structural value. Learn how to protect your investment by reviewing Don’t Let Your Garage Floor Fall Apart.
If you live in Knoxville, TN or nearby communities across East Tennessee—including Oak Ridge, Crossville, Sevierville, Maryville, and Lenoir City—and want to skip the DIY hassle entirely, our expert team at Garage Floor Masters is here to help!
We offer premium Garage Floor Coatings using high-performance polyaspartic and epoxy floor coatings that are 4x stronger than standard epoxy, installed in just one day, and backed by over 140 custom colors. Total project costs depend on surface condition, repair complexity, and custom color selections, which is why we provide free on-site estimates! Contact us today to transform your cracked garage floor into a durable, beautiful surface built to handle life.