
Why Your Patio Needs Outdoor Stone Epoxy
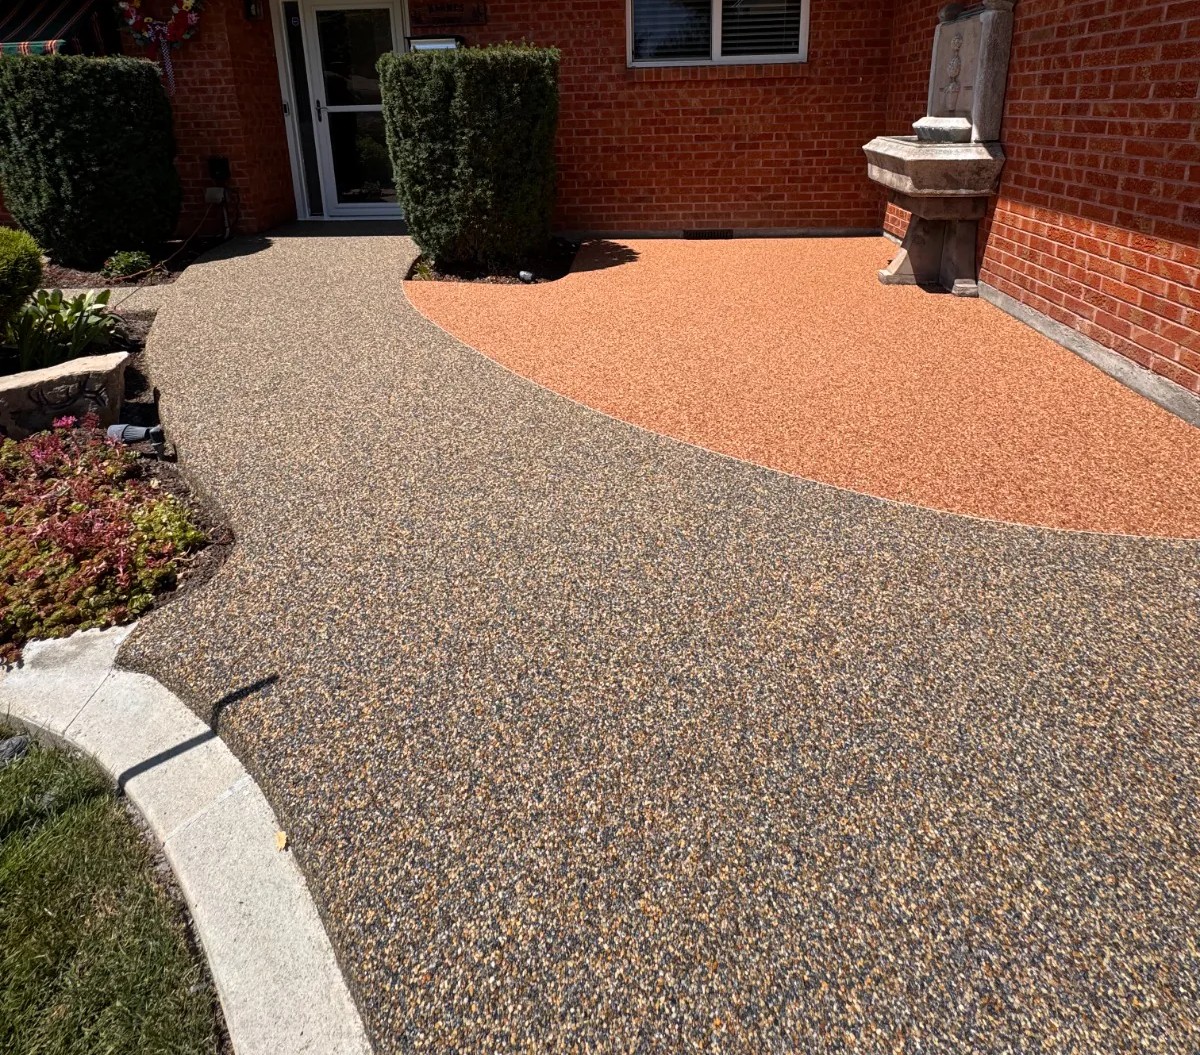
Using outdoor epoxy resin for stone is the easiest way to turn a cracked, stained concrete patio into a stunning, pebble-paved masterpiece. This specialized resin binds decorative gravel together to create a seamless, water-permeable surface that stands up to heavy foot traffic and tough weather.
If you want a quick summary of how to master this DIY project, here is what you need to know:
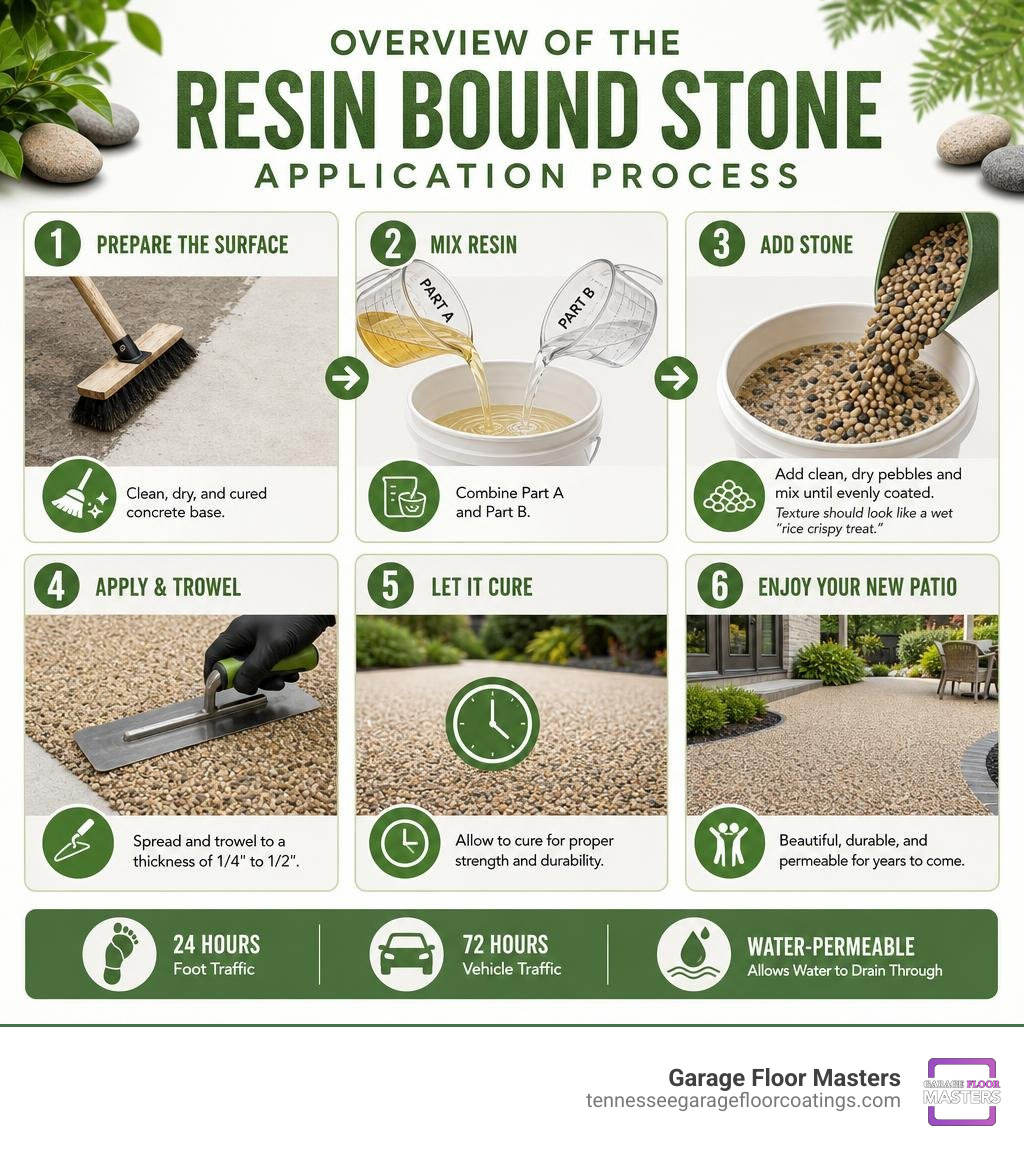
- The Golden Rule: Your concrete base must be 100% clean, dry, and cured for at least 30 days before you start.
- The Perfect Mix: Blend your epoxy parts first, then mix with clean, dry pebbles (1/8 inch to 3/8 inch size) until they look like a wet “rice crispy treat.”
- The Right Thickness: Trowel the mixture to a thickness of 1/4 inch to 1/2 inch.
- The Cure: Let it dry for 24 hours for foot traffic, and wait 72 hours before parking any vehicles on it.
In July 2026, homeowners are looking for ways to stop fighting with ugly, cracked concrete. Standard concrete coatings often peel, but a resin-bound stone overlay breathes new life into your outdoor space. It bonds deep, allows water to drain right through, and gives you a beautiful, slip-resistant surface that hides imperfections.
We can include ranges for pricing, but the total cost is always based on the condition of your project and the specific features you select. That is why at Garage Floor Masters, we offer a free on-site estimate to help you plan perfectly.
Outdoor epoxy resin for stone basics:
Understanding Outdoor Epoxy Resin for Stone
Before you grab a trowel and start dumping gravel, it is important to understand exactly what you are working with. Standard indoor epoxy and specialized outdoor stone epoxy are two completely different beasts.
What is Outdoor Epoxy Resin for Stone?
An outdoor epoxy resin for stone is a heavy-duty, weather-resistant binder engineered specifically for aggregate bonding. Unlike standard countertop or garage epoxy—which dries into a rigid, plastic-like sheet—outdoor stone epoxy is formulated to encapsulate individual stone particles while retaining subtle elastomeric properties.
This flexibility is crucial. In East Tennessee, our weather swings from freezing winters to scorching summer afternoons. If your binder cannot stretch and contract with these temperature changes, your beautiful stone overlay will quickly crack and delaminate.
Furthermore, professional systems use advanced aggregate adhesion chemistry. This ensures that every pebble is locked in place, preventing loose stones from flying up when you blow leaves or walk across the patio.
Benefits of Resin-Bound Stone Applications
Why choose a resin-bound stone system over traditional concrete or pavers?
- Excellent Permeability: A properly applied stone overlay allows rainwater to pass directly through the surface and into the ground below. This eliminates standing puddles, reduces ice sheets in the winter, and mitigates local runoff.
- Built-in Slip Resistance: The natural texture of the pebbles creates a highly slip-resistant surface, making it ideal for pool decks, steps, and sloped walkways.
- No More Weeds: Unlike traditional pavers, there are no open sand joints for weeds and algae to take root.
- Seamless Aesthetics: You can smooth this overlay right across existing expansion joints and minor cracks, creating a beautiful, continuous stone rug.
If you want to see how these overlays look in our local area, check out our guide on a Decorative Stone Overlay In Knoxville Tn.
Planning Your DIY Project: Coverage, Ratios, and Costs
A successful DIY project relies entirely on proper planning. If you run out of mixed resin halfway through your patio, you will end up with an ugly, visible seam where the old batch met the new batch.
Calculating Coverage Rates and Mixing Ratios
To achieve the recommended thickness of 1/4 inch to 1/2 inch (roughly the depth of one to two pebbles), you must carefully calculate your stone-to-resin ratio. Industry standards suggest using smooth, round pebbles sized between 1/8 inch and 3/8 inch.
Here is a quick reference guide based on professional-grade 300/21 laminating epoxy kits:
| Kit Size (Epoxy) | Required Pebble Weight | Estimated Coverage (New Install) | Estimated Coverage (Re-coating) |
|---|---|---|---|
| 1.5 Gallons | 150 lbs | 75 sq. ft. | 300 sq. ft. |
| 3.0 Gallons | 300 lbs | 150 sq. ft. | 600 sq. ft. |
| 6.0 Gallons | 600 lbs | 300 sq. ft. | 1,200 sq. ft. |
| 15.0 Gallons | 1,500 lbs | 750 sq. ft. | 3,000 sq. ft. |
Note: Re-coating an existing pebble surface requires much less epoxy because you are only sealing the top layer, not binding loose stones together.
For more details on budgeting and planning your material costs, read our Pebble Epoxy Pricing A Rock Solid Guide To Your Patio Budget.
Professional-Grade Kits vs. Generic Alternatives
When shopping for materials, you will find professional-grade kits (like the Stone Bond Epoxy Kit by McKinnon Materials) and cheaper, generic retail kits.
While a generic kit might save you money upfront, it often lacks the long-term UV stabilizers and high-performance polymers found in professional systems. Cheap epoxies tend to turn brittle and yellow within 12 to 18 months, requiring annual resealing. A professional-grade kit, when applied correctly, can easily last 3 to 4 years before needing a refresh.
While we can share general pricing ranges for these kits, the final cost of any patio upgrade depends heavily on the condition of your concrete and the specific design features you choose. To see how these costs break down, take a look at Outdoor Epoxy Patio Pricing From Drab To Fab Without Going Broke.
How to Apply Outdoor Epoxy Resin for Stone
Now that you have your materials, it is time to get your hands dirty. Applying a resin-bound stone overlay is highly rewarding, but you must work systematically.
Preparing Your Concrete Surface
If you skip surface preparation, your new stone floor will peel off. It is as simple as that. Before you mix a single drop of epoxy, complete these steps:
- Clean Thoroughly: Pressure wash the concrete to remove dirt, mildew, oil, and grease. Epoxy will not bond to oily surfaces.
- Repair Cracks: Fill any major structural cracks or deep pits.
- Check Moisture: The concrete must be 100% dry. If you apply epoxy over damp concrete, moisture will get trapped underneath, creating permanent white, cloudy spots in the finish.
- Prepare the Pebbles: If your pebbles arrived dirty or dusty, wash them thoroughly and let them dry completely in the sun before mixing.
Here are the essential tools you should gather before starting:
- Heavy-duty drill with a spiral mixing paddle
- Clean 5-gallon mixing buckets
- Flat concrete trowel (steel)
- Paint rollers (for priming and sealing)
- Cleaning solvent (like acetone) and clean rags
- Protective gloves and safety glasses
To get your backyard space ready for a summer upgrade, check out our tips on how to Spruce Your Patio In Summer.
Step-by-Step Guide to Applying Outdoor Epoxy Resin for Stone
Once everything is prepped and bone-dry, follow these application steps:
Step 1: The Double-Mixing Technique
Measure your epoxy Part A and Part B precisely according to the manufacturer’s instructions. Mix them together in a clean bucket using your drill mixer for at least two minutes. Pour the mixture into a second clean bucket and mix for another minute. This “double-mixing” technique ensures there is no unmixed resin left on the sides of the bucket, which would cause soft, sticky spots on your patio.
Step 2: Coating the Stones
Pour your dry pebbles into a large mixing tub or wheelbarrow. Slowly pour the mixed epoxy over the stones. Mix thoroughly until every single pebble is lightly coated. You want a dry, cohesive texture that looks like a wet rice crispy treat. Do not over-saturate or flood-coat the stones, as excess epoxy will pool at the bottom and yellow in the sun.
Step 3: Troweling the Mix
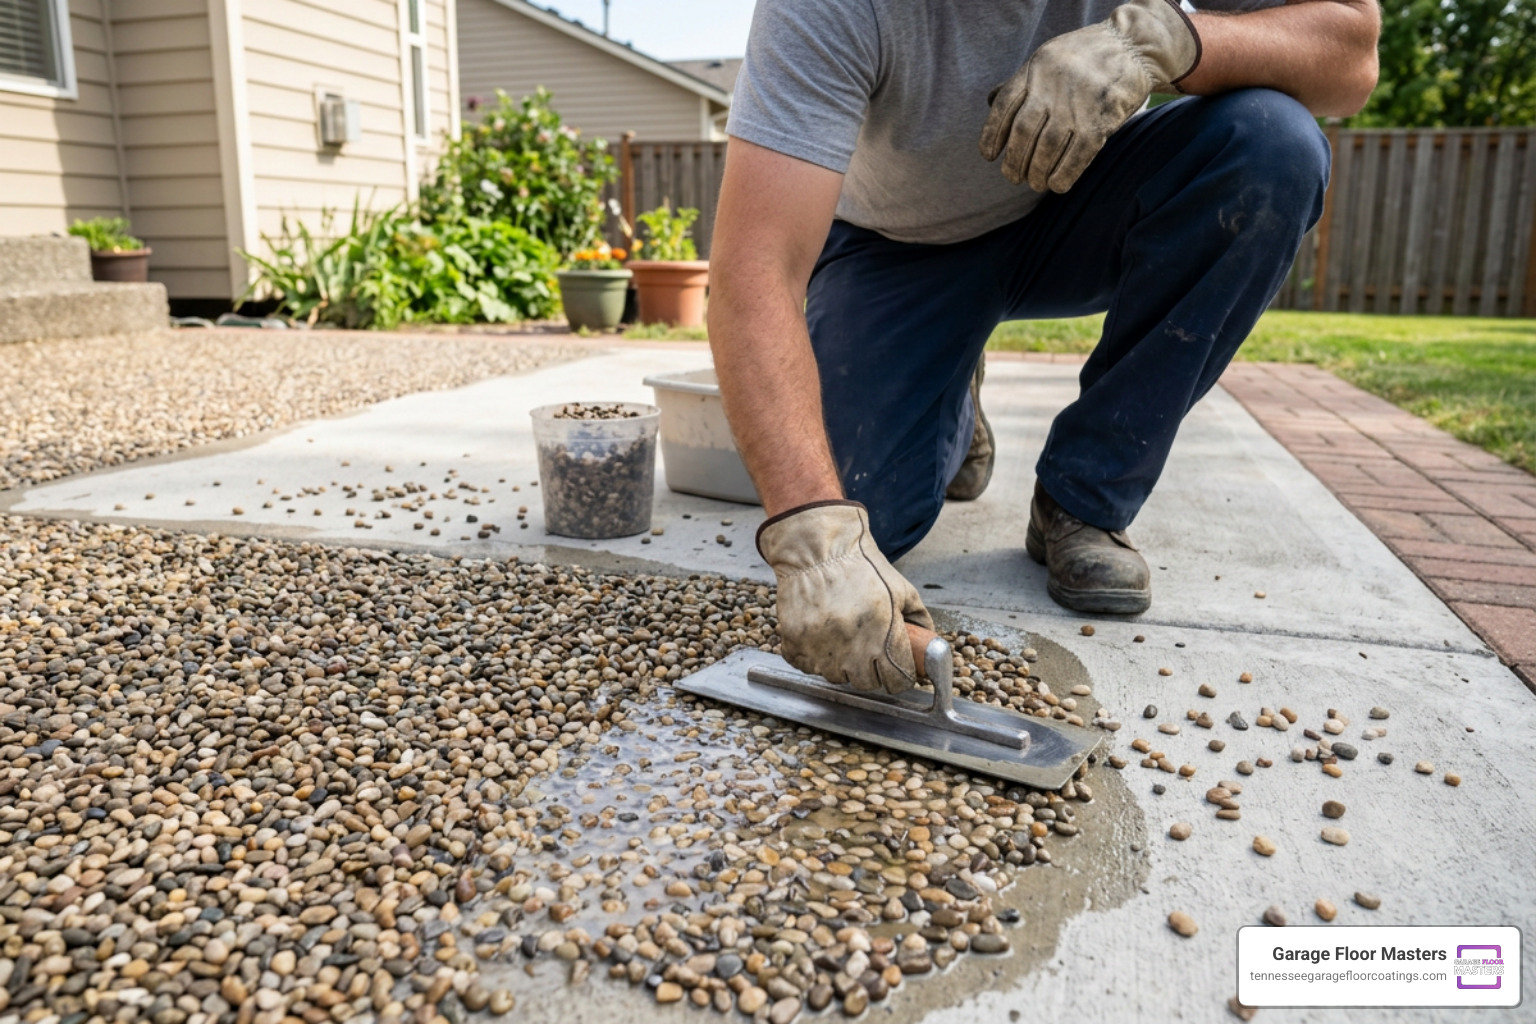
Dump the mixture onto your concrete and spread it out. Use your steel trowel to smooth and compact the stones to a thickness of 1/4 inch to 1/2 inch. Keep a rag soaked in acetone nearby; wiping your trowel frequently prevents the sticky resin from pulling the stones back up as you work.
Step 4: Finishing the Edges
If your patio has open edges, use temporary wood forms to hold the stones in place while they cure. Seal all exposed outer edges with a neat coat of epoxy to prevent water from creeping underneath.
Curing Times and Environmental Factors
Epoxy is a chemical reaction, which means it is highly sensitive to the world around it.
Temperature and Weather Considerations
The ideal temperature range for applying outdoor epoxy resin for stone is between 60°F and 85°F.
- The Working Life: At 70°F, you have about 30 minutes of working time once the epoxy is mixed (extended to 45 minutes once mixed with cold stones). In hotter weather, the epoxy will cure much faster, so work in smaller batches.
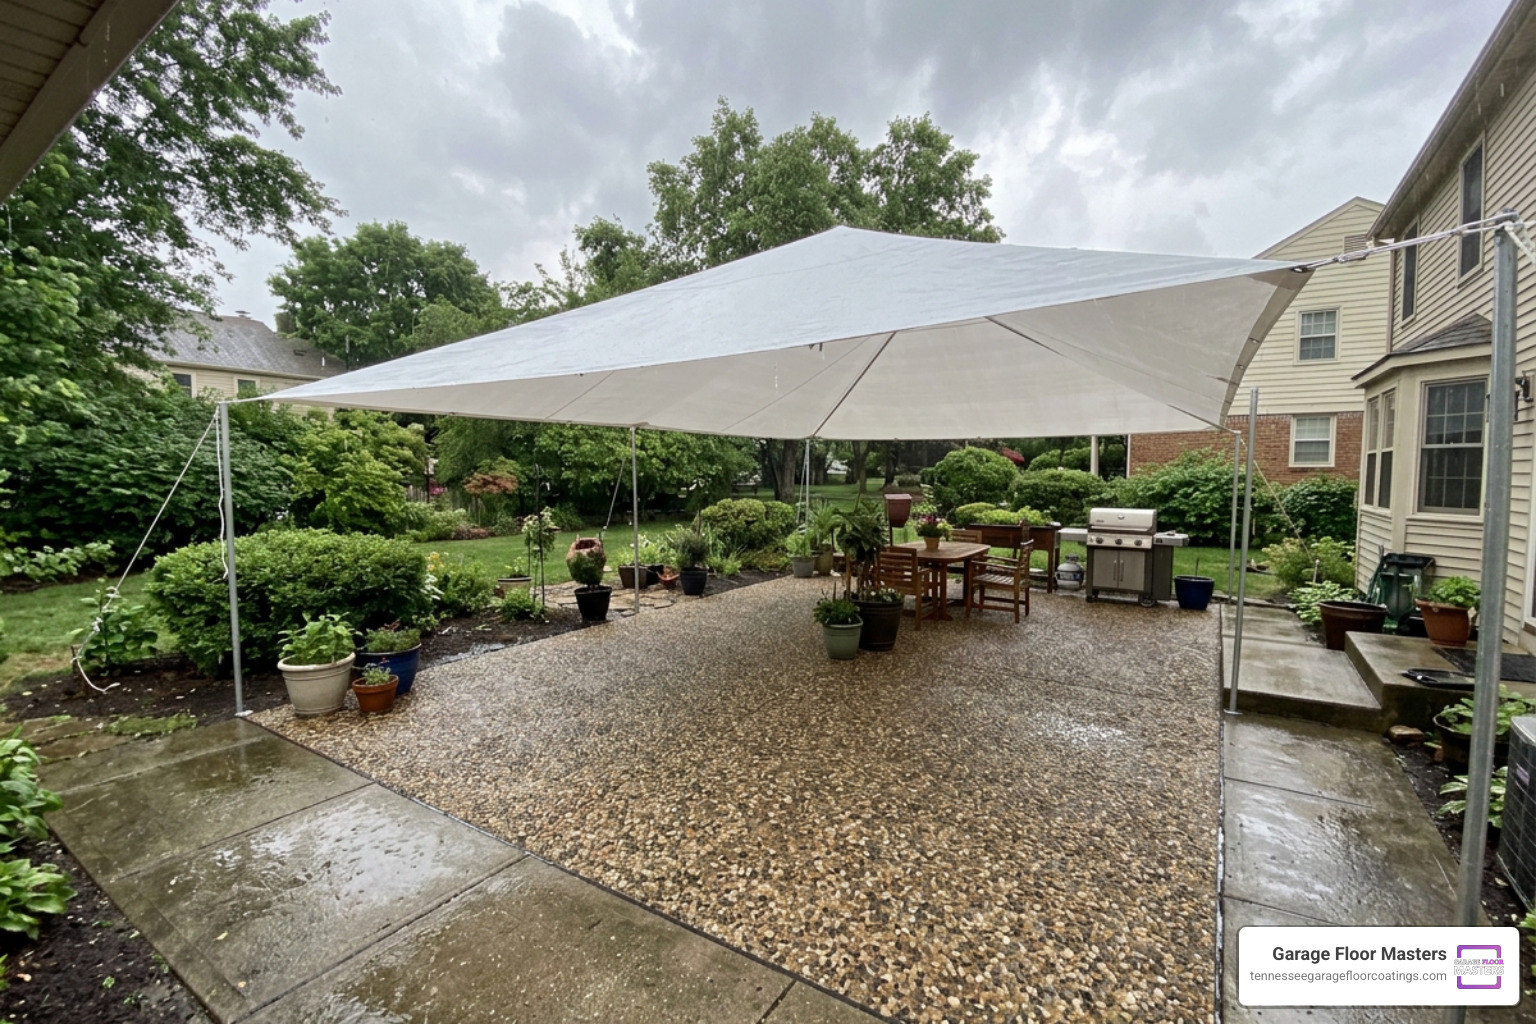
- Rain Protection: Rain is the ultimate enemy of uncured epoxy. If it rains within 48 hours of application, the water will react with the resin, turning your patio a patchy, cloudy white color that cannot be cleaned. Always check the forecast and have a clean tarp suspended above your work area just in case.
Long-Term Durability and Maintenance
A beautiful stone patio is an investment in your home. With a small amount of regular care, it will look brand new for years.
UV Resistance and Yellowing Prevention
Even the highest-quality epoxy will eventually experience some UV degradation when exposed to direct sunlight. To minimize this:
- Choose the Right Stone Color: Avoid bright white or light grey stones. Yellowing is highly visible on light backgrounds. Instead, opt for warm earth tones, browns, reds, or dark greys.
- Pebble Shadowing: Because the pebbles are tightly compacted, they naturally shade the epoxy underneath them, protecting the deeper layers from UV rays.
- Apply a Protective Topcoat: After your initial installation cures, you can apply an ultra-clear, UV-resistant polyurethane or polyaspartic topcoat to lock in the color.
If you are thinking about bringing these beautiful stone textures closer to home, check out our insights on Basement Patio Projects.
Routine Maintenance for Resin-Bound Stone
Keeping your patio clean is incredibly simple:
- Weekly: Sweep or use a leaf blower to remove leaves, dirt, and organic debris. If left to rot, wet leaves can stain the stones.
- Seasonally: Gently pressure wash the surface (keep the nozzle at least 12 inches away) to flush out any fine dirt trapped between the pebbles.
- Every 3 to 4 Years: Roll on a fresh, thin maintenance coat of outdoor epoxy to restore the gloss and lock down any stones that may have loosened over time.
Frequently Asked Questions about Stone Epoxy
Can you apply outdoor stone epoxy over cracked concrete?
Yes, but you must prep the cracks first. Clean out any loose debris, fill the cracks with a high-strength concrete repair compound, and grind them smooth. Because a resin-bound stone overlay has slight flexibility, it can easily bridge hairline cracks and minor movement joints without cracking.
How often should you re-coat a pebble epoxy patio?
For typical residential patios and pool decks, we recommend applying a light re-coat using a paint roller every 3 to 4 years. For high-traffic commercial driveways or walkways, a re-coat every 2 years will keep the surface strong and slip-resistant.
Can outdoor epoxy be used inside a pool or pond?
No. Standard outdoor stone epoxies are not designed for constant submersion or heavy exposure to pool chemicals like chlorine. Constant submersion will eventually break down the resin bond, causing the stones to release.
Ditch the DIY Stress: Go with the Masters
While a DIY stone patio is a fantastic weekend project, it requires perfect weather, precise mixing, and hours of back-breaking trowel work. If you would rather spend your weekend relaxing, let Garage Floor Masters handle the hard work.
We offer professional concrete coating services throughout East Tennessee, including Knoxville, Oak Ridge, Crossville, Sevierville, Maryville, and the surrounding areas. Our high-performance polyaspartic coatings are 4x stronger than standard epoxy, completely UV stable (they will never yellow!), and can be fully installed in just one day. Plus, with over 140 colors to choose from, you can find the perfect look for your home.
Skip the sticky mess and get a beautiful, low-maintenance outdoor floor that is built to handle everyday life. Contact us today to schedule your free on-site estimate and explore our premium Patio Floor Coatings!